Real World Application for Images Filters
Today we live in a very competitive world. Each company wants you to buy it's product and more than likely, they have a competitor. So how do we decide which product to buy? A lot of it comes down to advertising and how the different companies market their products. Magazines, TV ads, models, these are all weapons used to conduct marketing warfare. But how do the models always look so good?
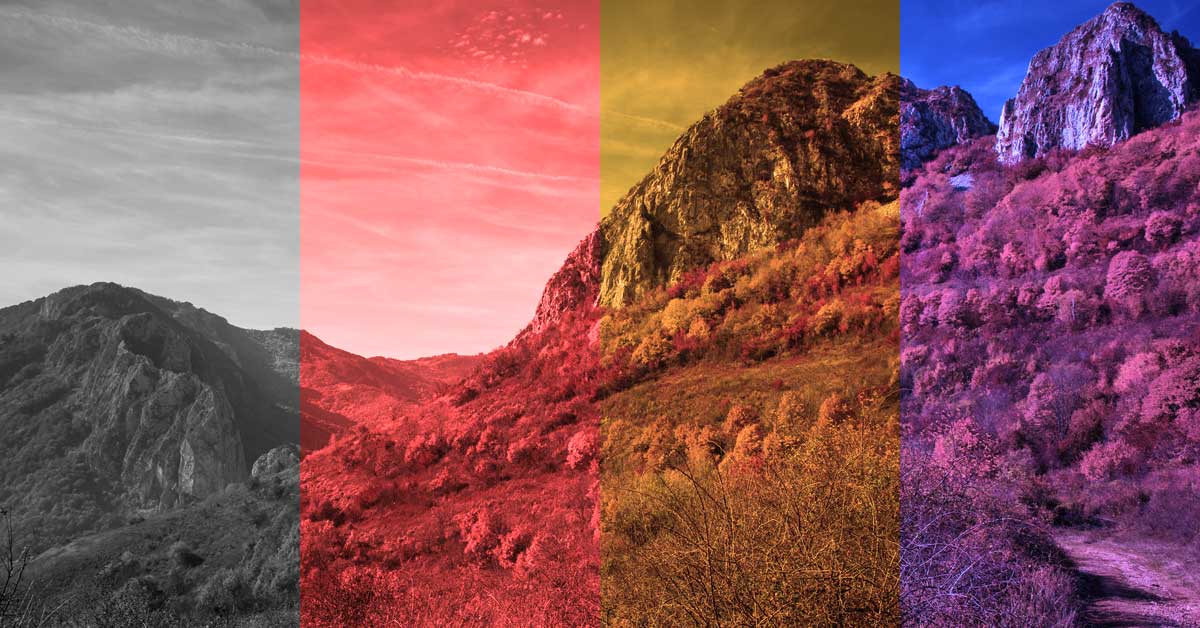
Well nothing is ever perfect (depending on who you ask) but there is a lot you can do to make things look more attractive. I lot of this is done by manipulating images. For example changing skin tones to a darker colour to make someone appear more tanned. Whilst I'm not going to demonstrate anything like making breasts larger or removing spots, I am going to show the basics of image composition and some things we can do by changing individual pixel values.
A lot of what I will be doing is using pixel ratios, this is where you take a constant (for example 0.2) and multiply it by the original pixel value to create a new one. Pixel ratios can be used to create gray scale and sepia effects.
[twentytwenty]
 [/twentytwenty]
Get to the code!
Enough waffle more code! First thing's first I will be using Dyalog APL and demonstrating a script and some filters myself and Gil made (along with the help of some of Phil Last's code for tessellation).
The script was created to set up a form and add two images side by side. The left one is the source and the right one is the target. When you select filters from the drop down menu on the form they will take the source image, create a modified version, and display it as the target image.
So let's inspect the first function in the script `LoadImage`:
LoadImage←{
          f←⎕NEW'Form'(('Caption'('SOURCE - ',⍵))('Size'(40 80))('Posn'(50 0)))
          f.mb←f.⎕NEW⊂'MenuBar'
          f.mf←f.mb.⎕NEW'Menu'(⊂'Caption' 'Filters')
          f.filters←f.mf.{
              ⎕NEW'MenuItem'(('Caption'⍵)('Style' 'Check'))
          }¨Filters.⎕NL ¯3
          f.filters.onSelect←⊂'applyFilter'f
          f.sbmp←f.⎕NEW'Bitmap'(⊂'File'⍵)
          f.tbmp←f.⎕NEW'Bitmap'(⊂'CBits'f.sbmp.CBits)
          f.simg←f.⎕NEW'Image'(('Picture'f.sbmp)('Size'(100 50))('Points'(0 0)))
          f.timg←f.⎕NEW'Image'(('Picture'f.tbmp)('Size'(100 50))('Points'(0 50)))
          f.Wait
      }
This code takes a right argument of a character vector. The character vector should have the full path to an image, try to use .jpg or .png images, other formats may not work.
First function breakdown
[1] Sets up a new form called `f` with a title (caption) of `Source - ` along with the file name. We also define it to be 40% of our screen in height and 80% of our screen in width, with a position of 50% down the screen. [2] We add a menu bar to the form, this will sit at the top and contain menus. [3] We add a menu to the menu bar with a caption of `Filters`. [4-6] We use a function to list all of the filters defined in a sub namespace, then add each one as a menu item with the style of `check`. [7] We set up an event handler to run the `applyFilter` function passing `f` as an argument. [8] We create a bitmap image from the file we passed to the function. [9] This creates an image by taking all of the `CBits` from the source image. [10] We create image objects on the form that display our source and target image. These have various position and size properties to lay them out next to each other. [11] Wait on user input.
Getting to the filters
Now we have the ground work in place. When we run this function, passing a valid path to an image file, we should be presented with a form and two images laid out next to each other. There are three other functions in the namespace #.ImageFilters and they are:
- applyFilter : This looks at all of the filters you have checked from the `Filters` and applies them.
- tessellate : This code was taken from Phil Last and it breaks a matrix down into an array of sub matrices. This is useful if I would to take 10*10 pixel blocks of an image.
- rgb_avg : This function takes a block of pixels, averages them and returns a block of averaged pixels, useful for the Duplo filter.
I am not going to go into the above functions as I don't anticipate you needing to change them much. The last thing I will explain before showing some cool examples is the `Filters` namespace that sits under the `ImageFilters` namespace. This contains all of the filters we want to apply to the image. Each filter gets passed the `CBits` to the right hand side. `CBits` contain information about the color of the image and we can split them into RGB values using the following code:
(3/256)⊤CBitsGoing beyond
Exploring how the filters work I will leave up to you the reader. I would love to see filters that other people have created and challenge you to come up with some new and exciting ones. A couple of ideas for filters are an ASCII filter or a Jigsaw filter. Please feel free to download the script and write your own filters, you can grab it here.
Former APL Developer
Knowing a software and games developer from a young age meant Callum was always intrigued by computer languages. From writing small applications and games in free time he progressed through sixth form and is now a Software Developer.
More from Callum
- APL CodeGolf Using MERN and APL
- Dyalog ’17 – Reflections on Day 2
- Server Support for Businesses
- Dyalog 17 begins
- Dyalog ’17 – Reflections on Day 1
- Dealing Cards in APL
- How ransomware can effect your business and what we can do to help
- What is lagom?
- Stormwind Simulator at Dyalog ’16
- APL Sounds Good – Part 2: Transformers